
Rolling Waves Sunset View
Hello, friend, and welcome to the Team Stamp It Summer Fun Blog Hop!
Whether you are arriving from another stop on the hop or visiting me first, I am so happy you are here. Grab something cold to drink, preferably with a tiny umbrella in it, and let’s escape to the beach for a little paper-crafting vacation. 😄
At the bottom of this post, you will find the complete blog hop list so you can visit each designer and soak up all the Summer Fun inspiration.
Be sure to leave a comment on every blog using the hashtag #stampitcontest for your chance to win the Adventure Awaits Kit!
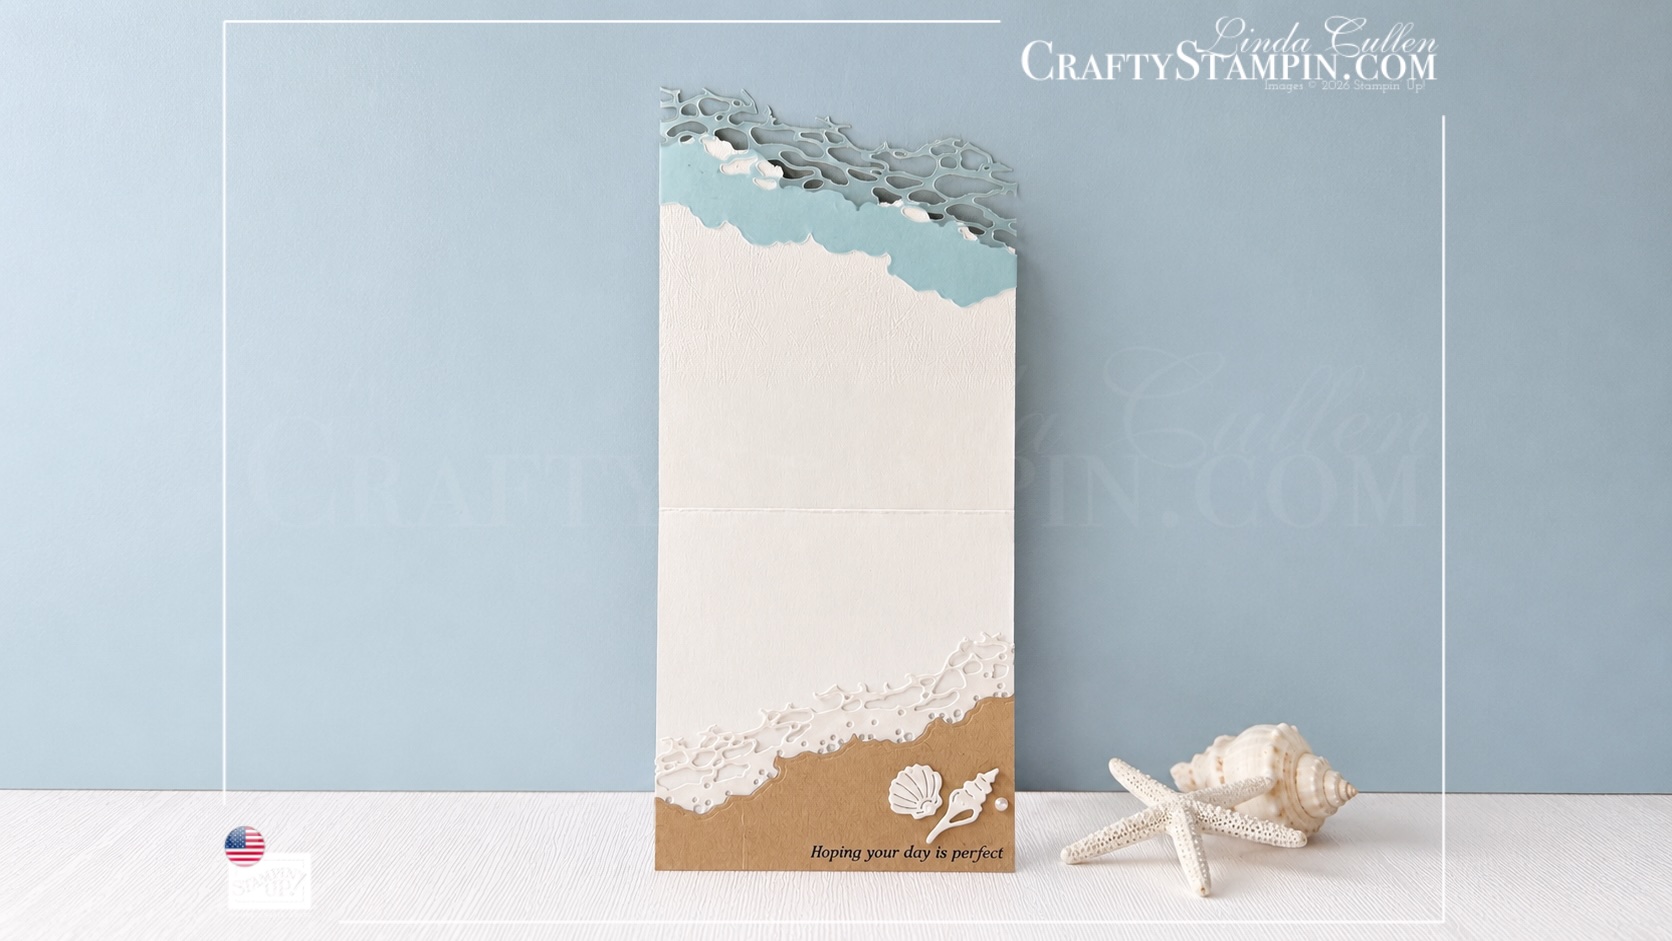
Beach at Sunset
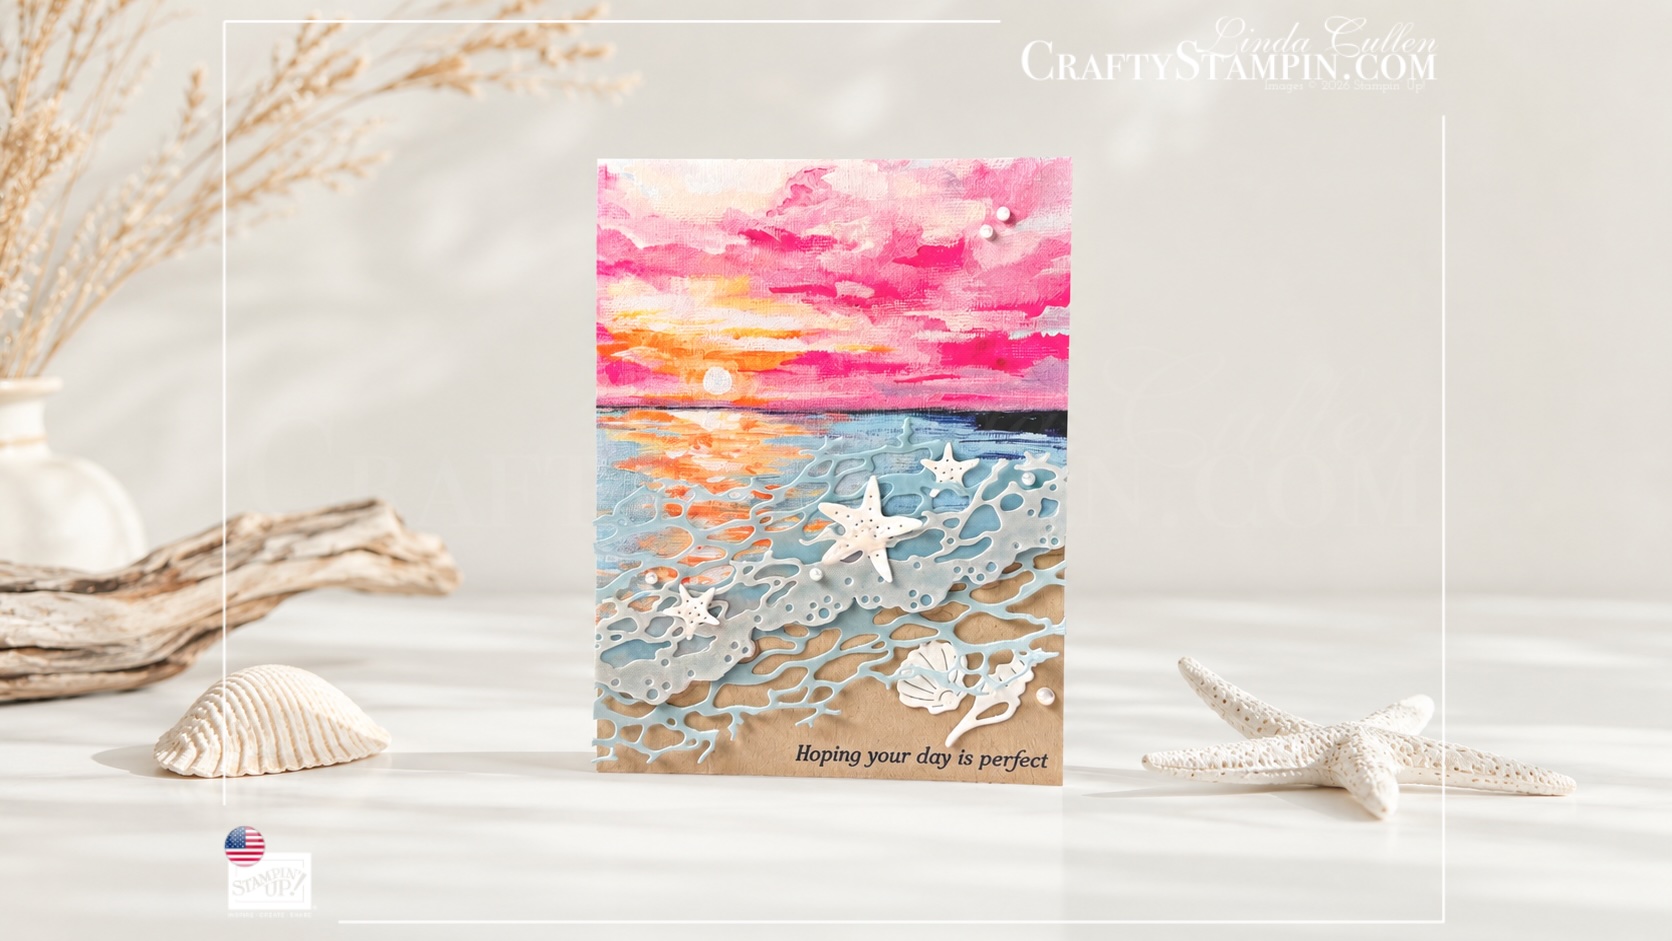
Summer evening strolls along the beach create some of the best memories. The colorful sky, shimmering water, foamy waves, and little treasures scattered across the sand inspired today’s card.
I combined the Scenic Coast Designer Series Paper with several dies from the Rolling Waves Dies to create layers of rolling water and sea foam. There is quite a bit happening along this shoreline, but that is exactly what makes it fun.
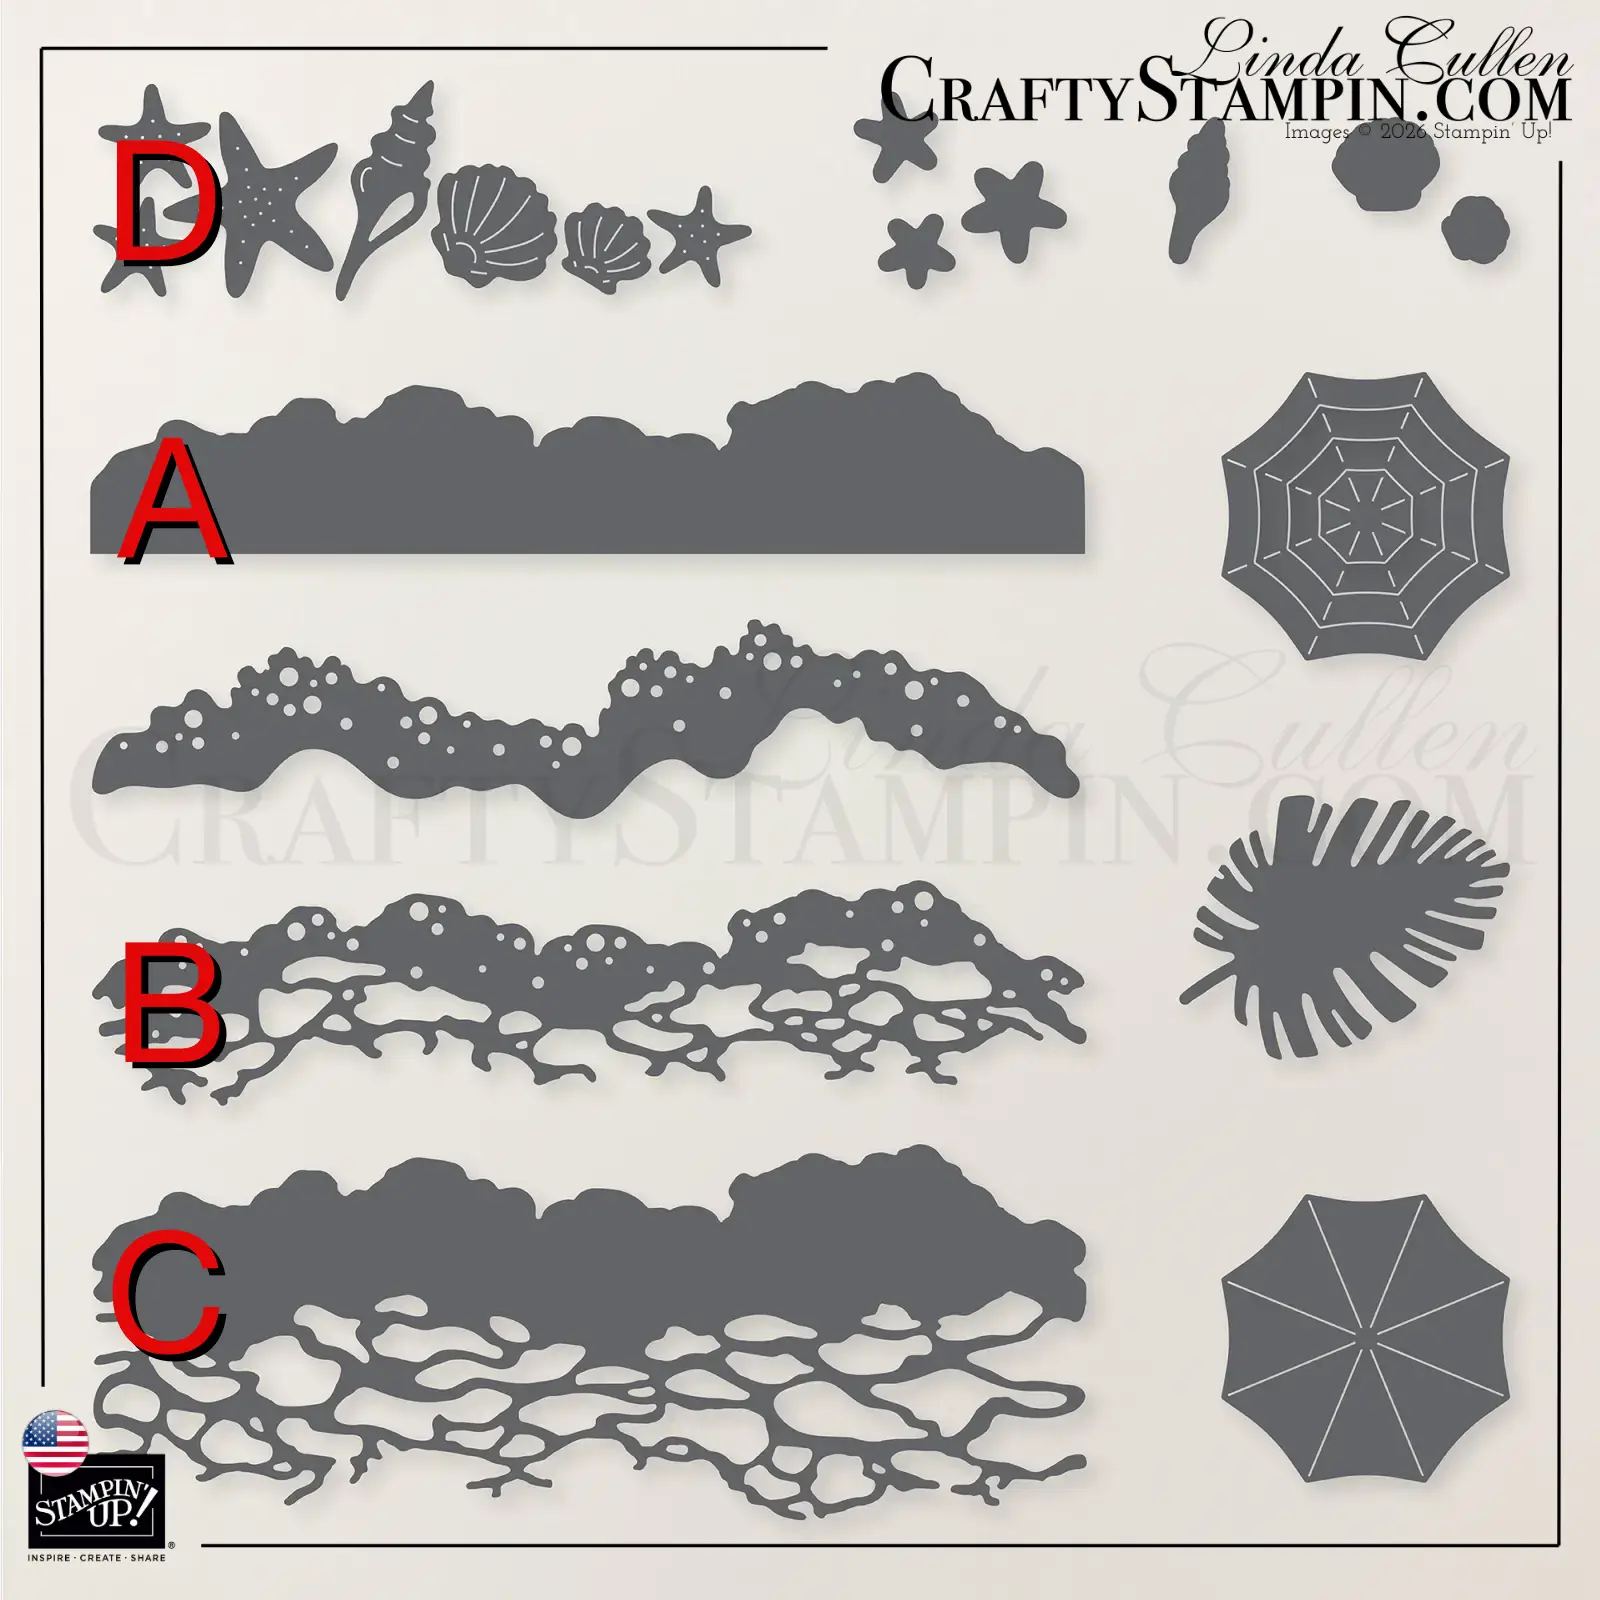
Because I used several similar-looking dies, I labeled them A, B, C, and D in the die reference photo. That should make the instructions much easier to follow. No squinting at tiny dies and wondering which wiggly piece I mean. You’re welcome. 😄
Creating the Card
Step 1: Create the Sunset Card Front
Attach the Scenic Coast Designer Series Paper to the front panel of the card base using Stampin’ SEAL.
Position Die A across the lower portion of the front panel. Angle the die slightly.
Run the panel through the Stampin’ Cut & Emboss Machine.
This decorative edge creates the shoreline and allows the Crumb Cake layer inside the card to show beneath it.
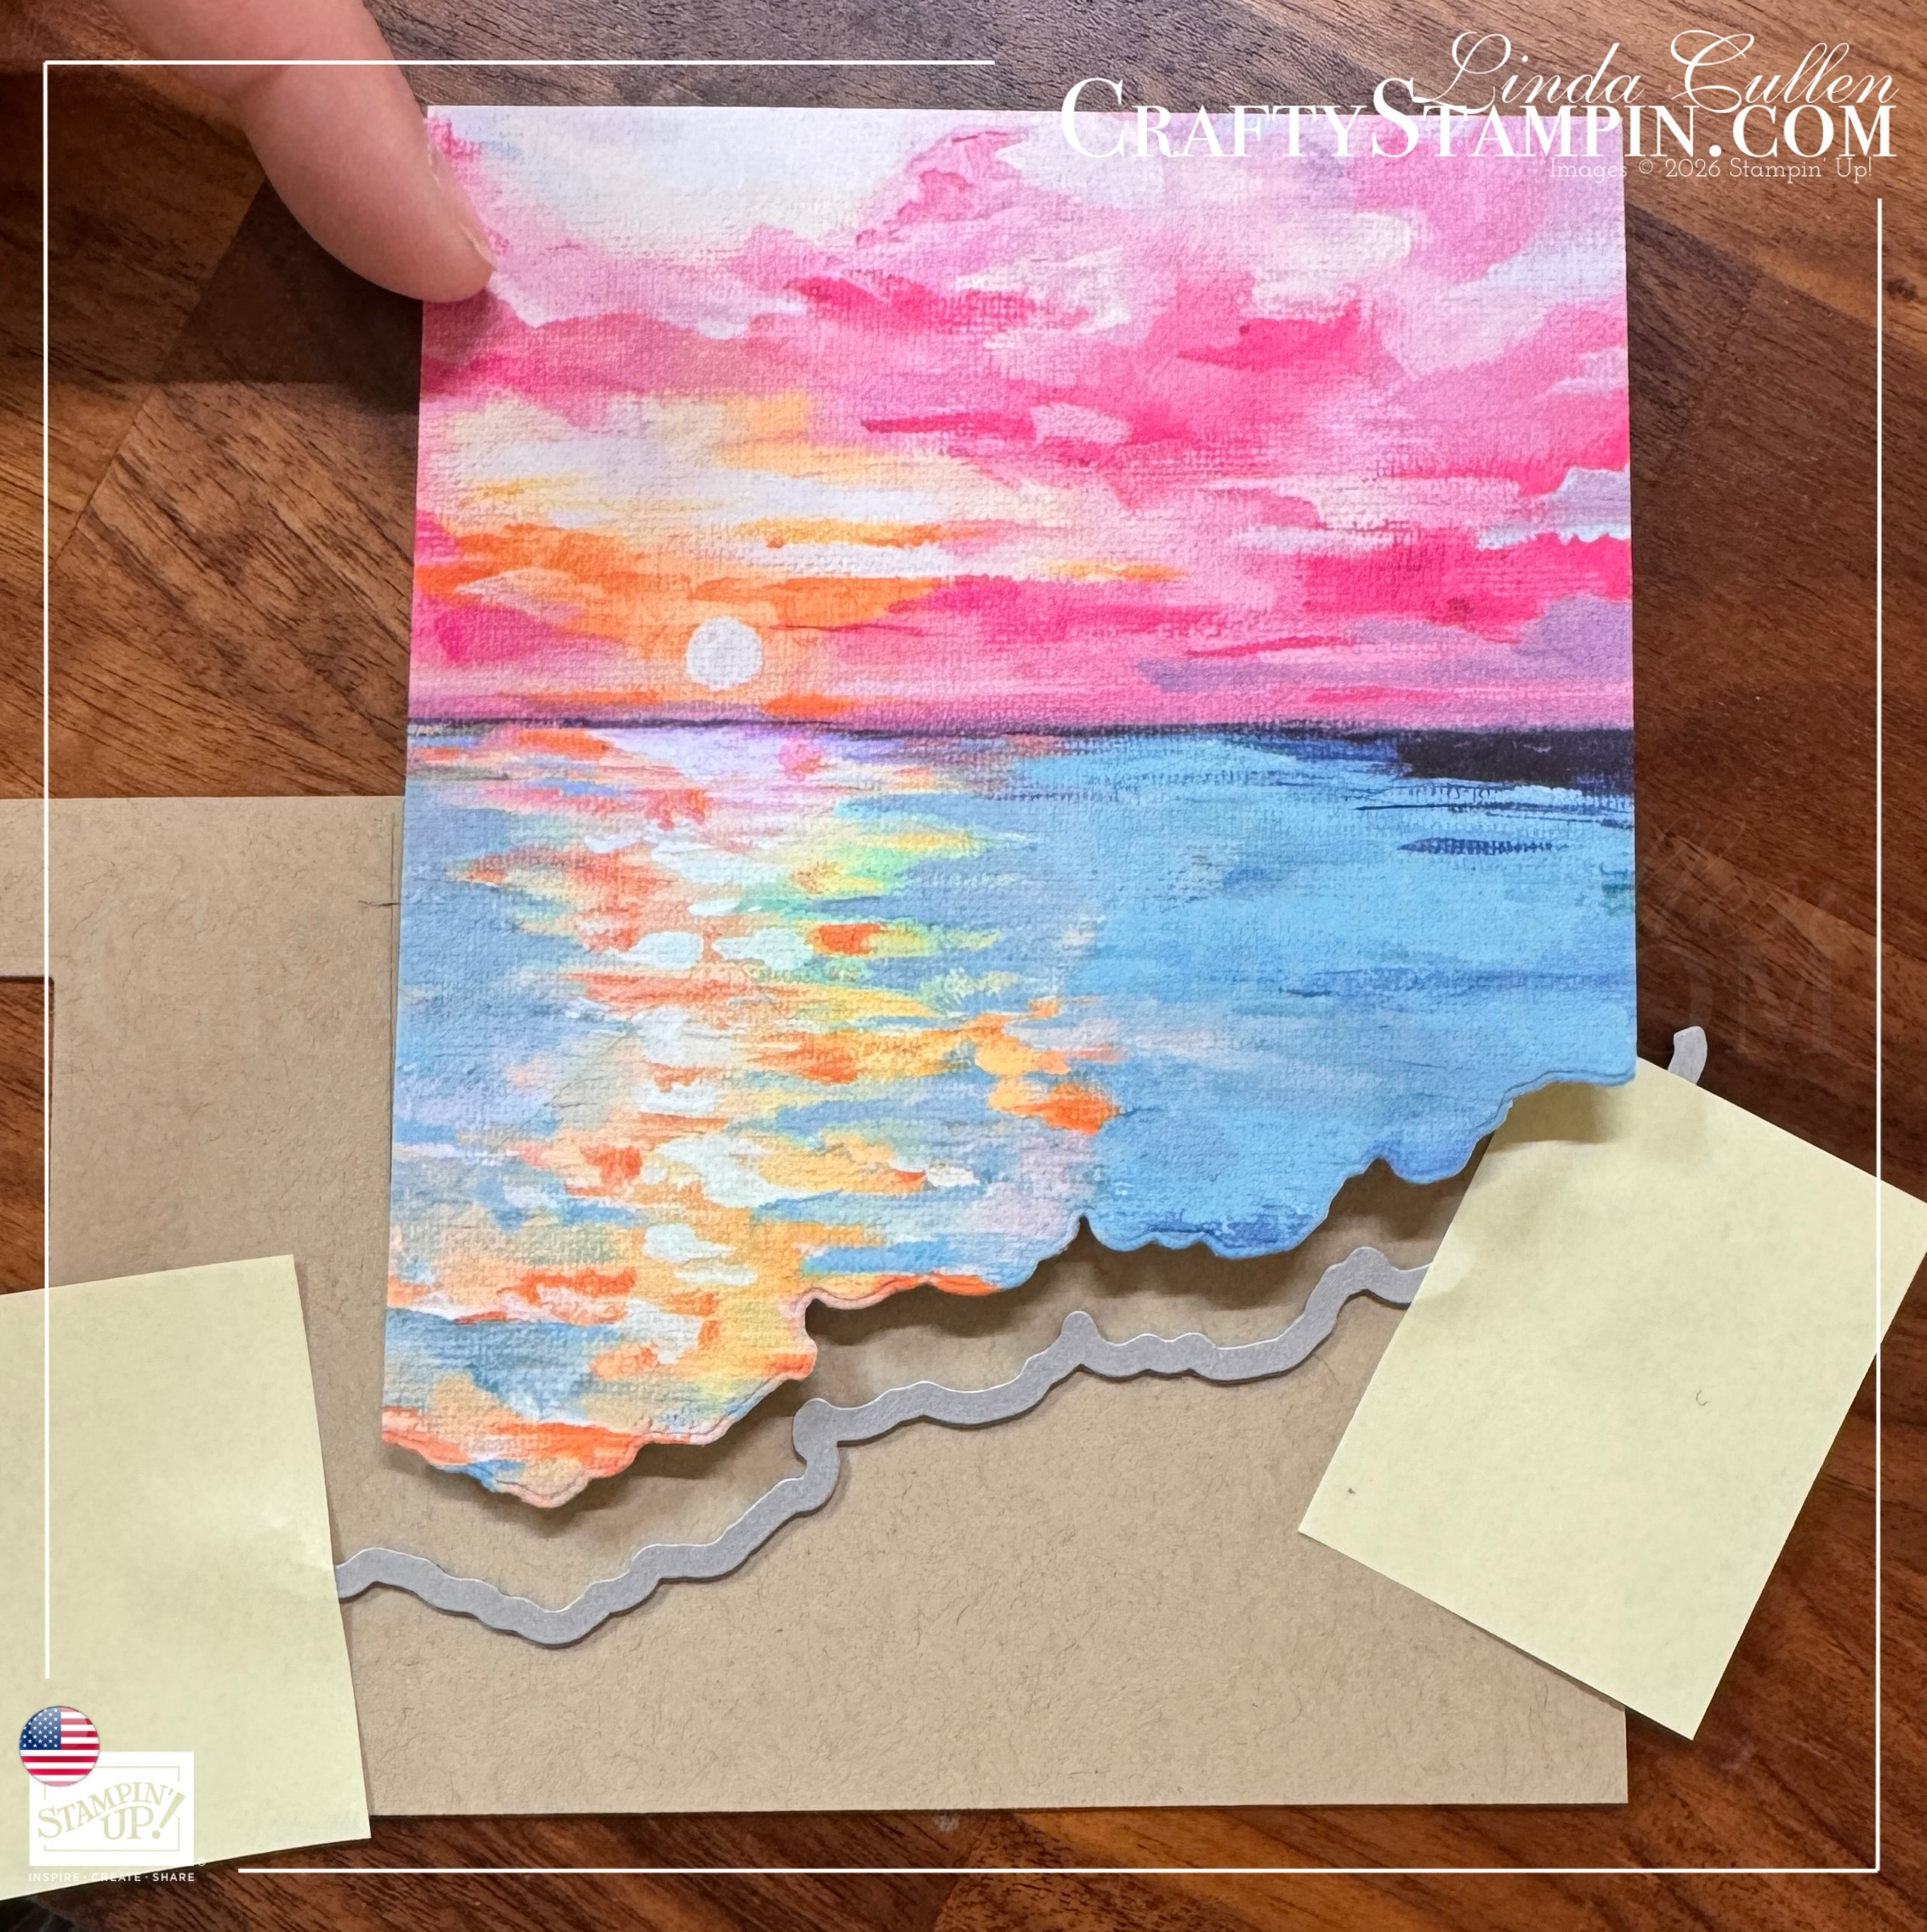
Step 2: Cut the Crumb Cake Shoreline
Place the Crumb Cake panel underneath the decorated front panel. Line it up carefully with the bottom and side edges of the card.
Use the cut edge of the front panel as a guide when positioning Die A on the Crumb Cake panel. Secure the die with Post-it Notes or low-tack tape, then run the panel through the Stampin’ Cut & Emboss Machine.
Trim the Crumb Cake panel as needed so it fits neatly inside the card. Mine was originally a little too wide, because apparently, cardstock likes to keep us humble.
Attach the finished Crumb Cake panel to the inside of the card.
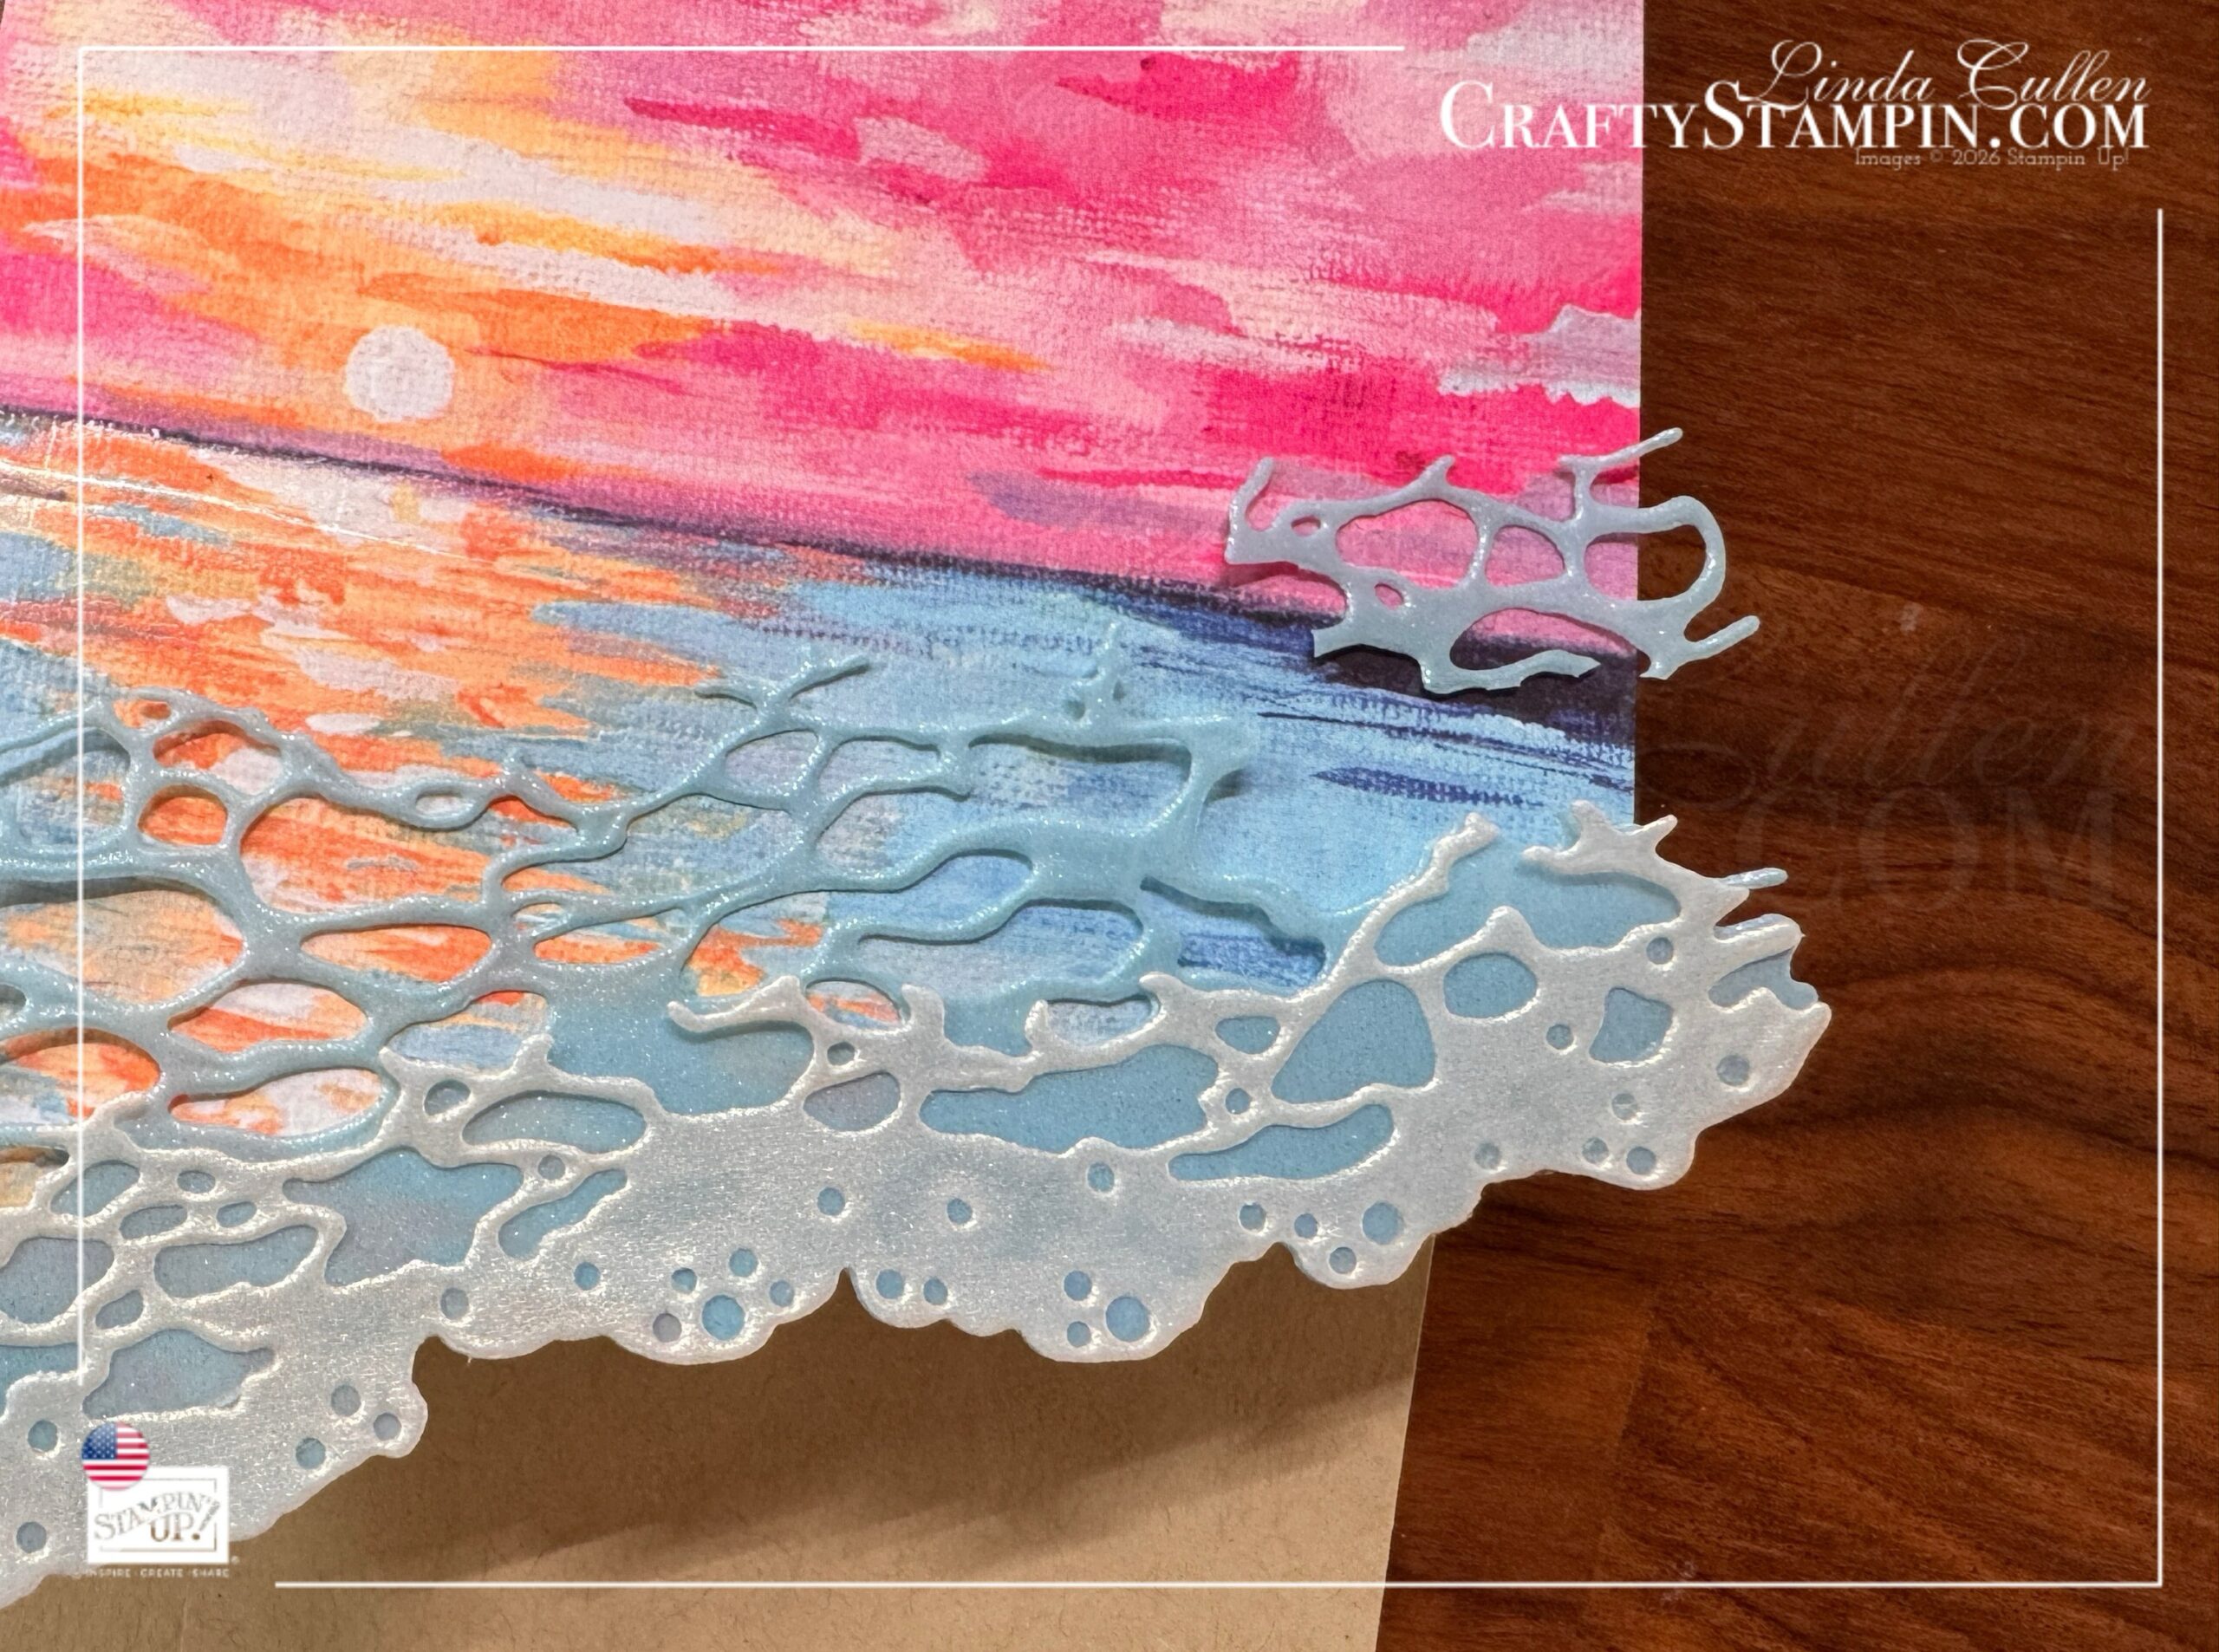
Step 3: Create the Rolling Water Layers
Cut Die C twice from Balmy Blue Sunset Shimmer Vellum.
Cut Die B once from Iridescent Sunset Shimmery Vellum.
Layer the Iridescent Sunset Shimmery Vellum piece over one of the Balmy Blue pieces. Use small dots of Multipurpose Liquid Glue.
Attach the layered die cuts to the front of the card, matching them to the decorative edge created with Die A.
Trim the Balmy Blue die cut as needed so the edges fit the card front neatly, see image below.
Attach the second Balmy Blue Sunset Shimmer Vellum die cut to the back of the front panel, with part of it extending below the panel. This creates another layer of water, giving the shoreline more movement and dimension.
Step 4: Add the Greeting
Stamp the greeting near the bottom of the Crumb Cake panel using Night of Navy Classic Stampin’ Ink.
The dark blue greeting coordinates beautifully with the horizon line in the Designer Series Paper and stands out nicely against the sandy Crumb Cake cardstock.
Step 5: Add the Seashells and Starfish
Use Die D to cut the seashells and starfish from Fluid 100 Watercolor Paper. I love the texture that the Watercolor Paper adds to dies.
Arrange the starfish among the layered waves on the front of the card and attach them with Mini Glue Dots.
Attach the seashells to the Crumb Cake panel inside the card using Mini Glue Dots.
Placing the die-cut pieces on different layers helps carry the beach scene from the front of the card into its interior.
Step 6: Add the Finishing Touches
Finish the card with several Iridescent Pearls scattered around the waves, sky, and sandy shoreline.
The pearls add just enough shimmer to resemble bubbles, sea spray, and tiny treasures glistening in the sunlight. Basically, they are the paper-crafting version of putting on earrings before leaving the house. Completely necessary. 😉

A Sunset Worth Saving
I love how all the different layers work together on this card. The Scenic Coast Designer Series Paper provides the gorgeous sunset, while the Rolling Waves Dies add texture, movement, and dimension.
The Sunset Shimmer Vellum is especially pretty when the light catches it. It gives the water a soft, translucent glow without covering the colorful scenery underneath.
This design would be perfect for a summer birthday, beach-loving friend, vacation memory, or anyone who deserves a peaceful sunset by the sea.
Keep Hopping ⭐️
Thanks so much for stopping by to see my Summer Fun project for this month’s Team Stamp It Blog Hop.
I hope this colorful beach scene inspired you to pull out your summer supplies and create your own little paper getaway. No sunscreen, sand in your shoes, or seagulls stealing your lunch required.
Be sure to continue through all the beautiful projects in this month’s lineup. You will find the complete list of blog hoppers at the bottom of this post.
😊 Include the hashtag #stampitcontest in your comment on each blog for your chance to win the Adventure Awaits Kit.
Linda Cullen, Crafty Stampin’
Helpful Links
Giveaway
New Giveaway

Last Month’s Winner

Blog Hoppers
Crafty Stampin’ Craftroom Sale 🎉
Hunting for retired Stampin’ Up! products. My Craftroom Sale, think garage sale for crafty treasures, is stocked with long-retired gems and recent favorites.
👉 Browse the Craftroom Sale and grab your favorites before they’re gone for good!
**I’m currently having issues with the USPS plug-in on my website. If there are products you are interested in, please just drop me an email. Thanks

Rolling Waves Card Color Palette
Rolling Waves Card Supplies
Click on any product photo below to purchase your favorites from my online store and recreate these cards, or use this layout with supplies you already own. ✨
Discover more from Crafty Stampin'
Subscribe to get the latest posts sent to your email.
Absolutely gives me the summer vibe! Love this card!
Linda, that’s just gorgeous!!