
Stamp It Group Mother’s Day Blog Hop

Welcome to Stamp It Group Mother’s Day Blog Hop. We are all using current Stampin Up Product. I’m Linda Cullen from Massachusetts, USA and you are visiting my blog Crafty Stampin’. At the bottom of my post you will find a list with all the participating blog hoppers so you can move along from blog to blog and see all the fantastic projects. Make sure to leave a comment on each blog with the hash tag #stampitcontest to be entered to win a Watercolor Wishes Card Kit.
Cards and Stationary Box
Do you ever get an idea stuck in your brain and you can’t let it go until you’ve completed the idea. This is me today….Friday, the day before this blog hop is to go live. I’m thinking I really only need to create one card to be done and I can move on. But no, I have this need to create this complete project. I have loved the Project Life by Stampin Up card collections since they were introduced several years ago. I’m not really a scrapbooker. I feel proud that all my photos get off my camera on to my computer, but that is where they stay. Someday I’ll make some great books, but for right now they are double backed-up on my computer.
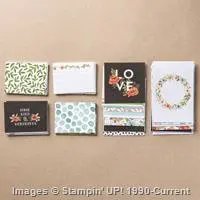
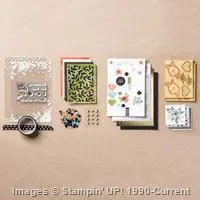
What I love about the Project Life card collections is how great they are for card making. For Mother’s Day I decided to up a card collection and make a stationary card box to hold all of the cards. I used the Hello Lovely Project Life Card Collection and Hello Lovely Project Life Accessory Pack for the Stationary Box and Cards. Unfortunately Becky Higgins announced that Stampin Up and Project Life were ending their partnership, so all the Project Life by Stampin Up products are on the retiring list, and currently “while supplies last,” so you will need to grab these amazing products before they disappear!
 I’ve made these boxes before, and followed a tutorial by Jackie Topa on Splitcoast Stampers, but that uses 12 x 12 paper and I don’t always have 12 x 12 paper that I want to use to make the box, so I came up with a version that uses 8 1/2 x 11 sheets to make the bottom of the box instead. I have a video at the bottom of this post showing how I did it.

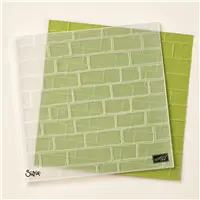
The Card Collection comes with double sided 4 x 6, 4 x 4, 3 x 4 cards. I cut up 2 4 x 6 card to decorate the box top. I used a second one to decorate the fronts of the card pockets on the inside of the box (first photo). The Accessory Pack has these really cool wood shapes. I used the flower one as the focal point of the box top. I cut some extra Basic Black panels and embossed them with the the Brick Wall embossing folder for some added interest on the bottom of the box.

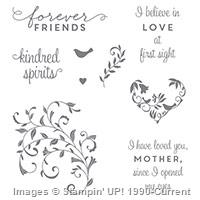
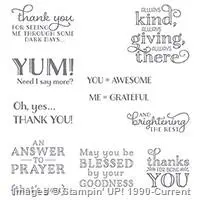
I made 6 traditional sized greeting cards. I added some stamped images from First Sight stamp set and Me = Grateful stamp set (both retiring) on a few, but I was able to die cut greetings right from the cards in the pack and use them as the focal point. Click through to see each card up close.
I also made 6 small tags with the 2 ” x 2″ cards that come in the Accessory Pack.

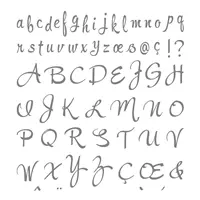
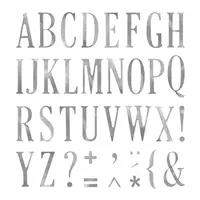
There are also 2 4 1/4″ x 4 1/4″ square cards. I used two alphabet stamp sets, Brushwork Alphabet and Letters For You to monogram them. I choose the “A” for my daughter Avery. The second square card is made up of 4- 2″x 2″ cards from the Accessory Pack.


I decorated the inside of the box with another 4″ x 4″ card from the Card Collection.

I just love all the images in Hello Lovely Project Life Card Collection and Accessory Pack, here are the cuts for the box and a video on how to put together the box.
Cuts for Box

Video
I created a box in white so you can see the cuts and scores better than on the black paper.
Giveaway

Winner from Last Month

Card Supplies
Click on any photo below to purchase product from my online store










Discover more from Crafty Stampin'
Subscribe to get the latest posts sent to your email.
![Coffee & Crafts: Seaside Notion Happy Birthday | Stampin Up Demonstrator Linda Cullen | Crafty Stampin’ | Purchase your Stampin’ Up Supplies | Seaside Notions Cling Stamp Set (En) [149278] | Artistry Blooms Designer Series Paper [152495] | Night Of Navy Stampin' Blends Combo Pack [154891] | Stitched Be Mine Dies [148527] | Perfect Parcel Dies [149627] | Stitched Shapes Dies [145372] | Timeless Label Punch [149516] | Pearl Basic Jewels [144219] | Stamparatus [146276] |](https://www.craftystampin.com/wp-content/uploads/2021/03/IMG_0098WM.jpg)
#stampitcontest Love it!
So love this collection of cards and holder!!! I have a set of these PL cards and am inspired to pull them out and make cards for my mother! Thanks so much for the inspiration! #stampitcontest
Wonderful projects, as usual! Thanks for the instructions and chance to win this fabulous prize!
#stampitcontest
WOW, absolutely beautiful!! #stampitcontest
Beautiful stationery set! #stampitcontest
#stampitcontest
Wow! So many pretty cards! TFS!
Pretty #stampitcontest
Beautiful stationery box! I’ve only made a couple of those, ever, because they are a ton of work! Hats off to you! #stampitcontest
#stampitcontest I have been looking for a nice card box to make as a gift, this one is perfect – thanks!
Love the color combo! Hope to see you again soon!
#stampitcontest
WOWZA!!!!! That’s awesome.
#stampitcontest
WOW you always do a great project. Love it! #stampitcontest
Beautiful set! Love it. #stampitcontest
#stampitcontest
I will have to make this box. Thanks
What a great idea! so pretty! #stampitcontest
#stampitcontest Wow! Amazing ideas!
#stampitcontest LOVE these ideas!
Great ideas
#stampitcontest
Nice. #stampitcontest
I want to try this. Thanks for the video! #stampingcontest
#stampitcontest
Linda, your cards are beautiful. Thanks for the video.
Love the inside of this card! #stampitcontest
Beautiful variety of cards! Thanks.
#stampitcontest
Beautiful projects! Love the cards. tfs
What a lovely gift idea
#stampitcontest
#stampitcontest What beautiful ideas! TFS.
#stampitcontest Beautiful!
#stampitcontest Thanks Linda, you are so creative!
#stampitcontest
WOW Linda! Beautiful project! TFS!!
Good idea!
Very thoughtful 🙂
#stampitcontest
#stampitcontest
Thanks for the cool card.
Neat box for cards as well as cards, nice of you to share thanks.
#stampitcontest
I love projects like this. They make wonderful gifts. You project was beautiful.
#stampitcontest
Beautiful cards and box. Thanks for sharing. stampitcontest
Love the card box. #stampitcontest
Hi Linda, A great gift set, love all the cards, TFS, #stampitcontest
#stampitcontest So many great ideas & projects Linda. Love it as always; you did an awesome job!
#stampitcontest
Wow — Can’t wait to try this one.
LOve these so much. So pretty using the project life cards. #stampitcontest
Love all the great cards and the box you were able to make with this PLkit! Thanks for the chance to win!! #stampitcontest
Wow! That is just beautiful! And the colors are just gorgeous! Thank you for the tutorial and a chance to win! #stampitcontest
#stampitcontest
Wow, what a gorgeous gift, lots of work but oh so worth it I’m sure. Thanks for sharing with us.
#stampitcontest love all of it. The colors are great. Thanks
That looks like a lot of work, but the end result was worth it!! So very pretty and useful. tyfs #stampitcontest
I love this project! I still have one that I made several years ago using the 12×12 paper, thank you for the alternative version using 81/2 x11 paper.
#stampitcontest
# stampitcontest. Loved the box and holder! Wish I would have had that box design when I evtered my Stampin’ Up cards in our art & craft contest ( I won first place by the way and second in state for our Woman’s Club with the cards). I will try this!
#stampitcontest what a great project. Just love it
#stampitcontest Linda….I love this project…Hello Lovely…yes sireeeeeee!
#stampitcontest Wow! These projects are awesomeness!!!
#Stampitcontest Would love to win this set! Love your cards!!
#stampitcontest
Absolutely stunning! I can’t wat to get my hands on this paper.
#stampitcontest Wow what a awesome idea. Beautiful.
#stampitcontest. I need to get the brick wall piece. Thanks.